Battery Volume Exploration

Battery Volume Exploration

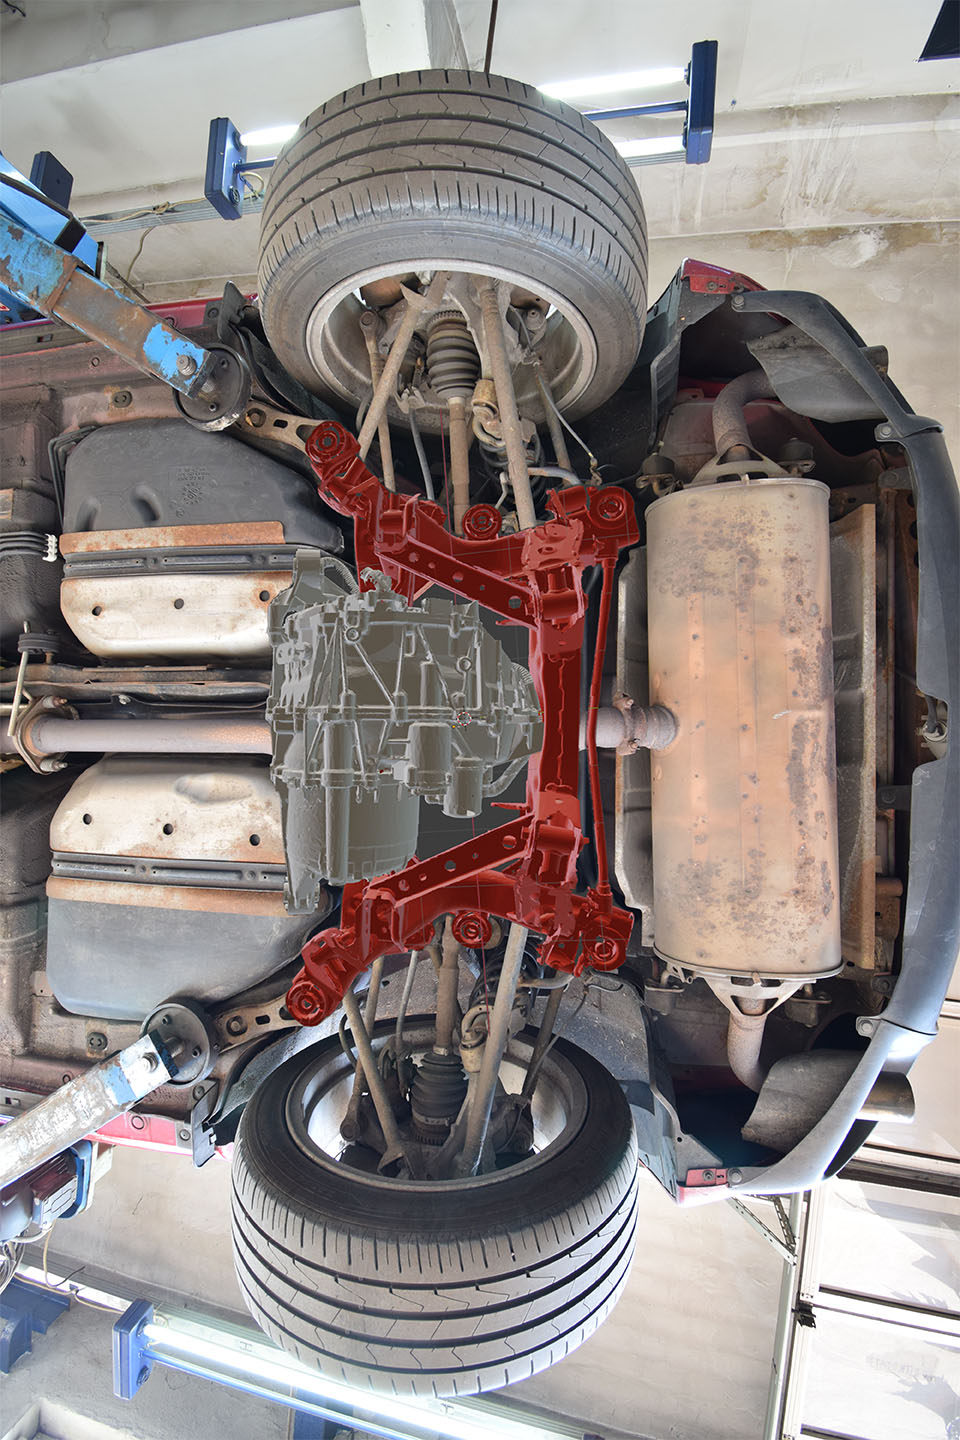
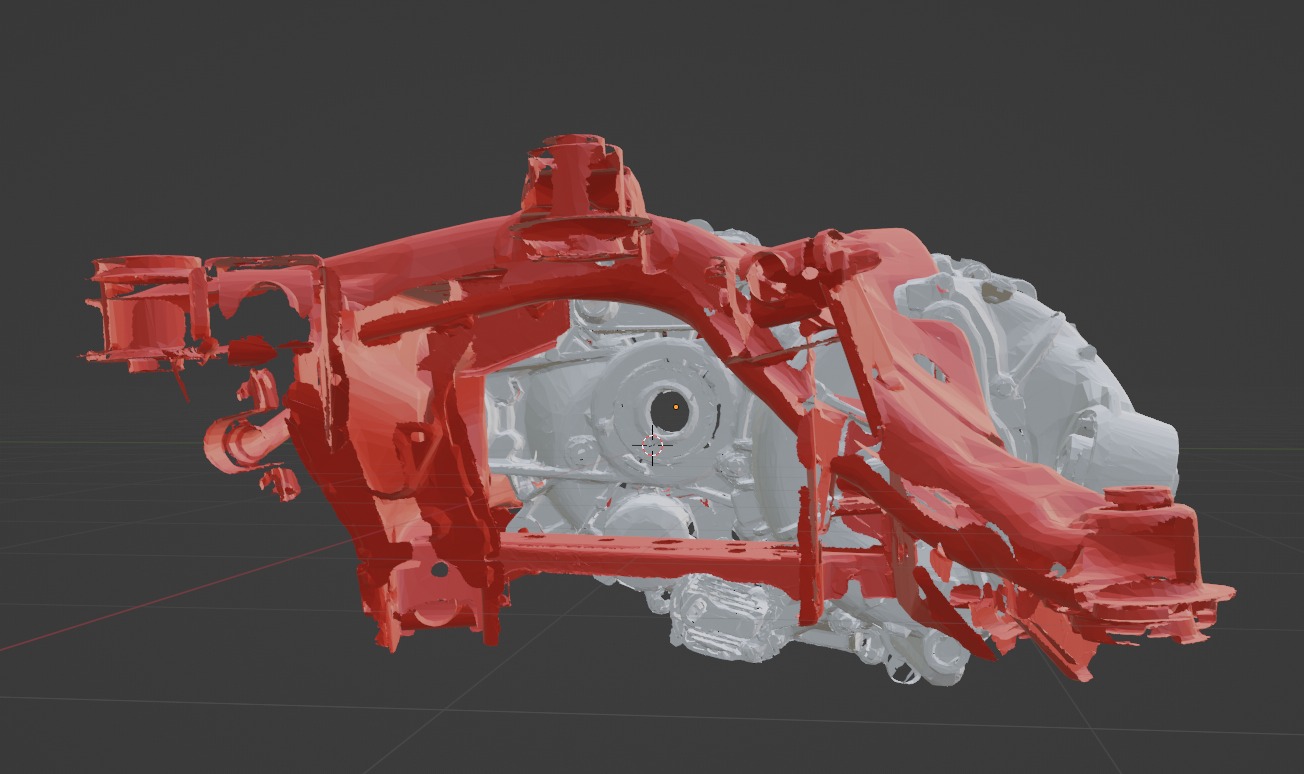
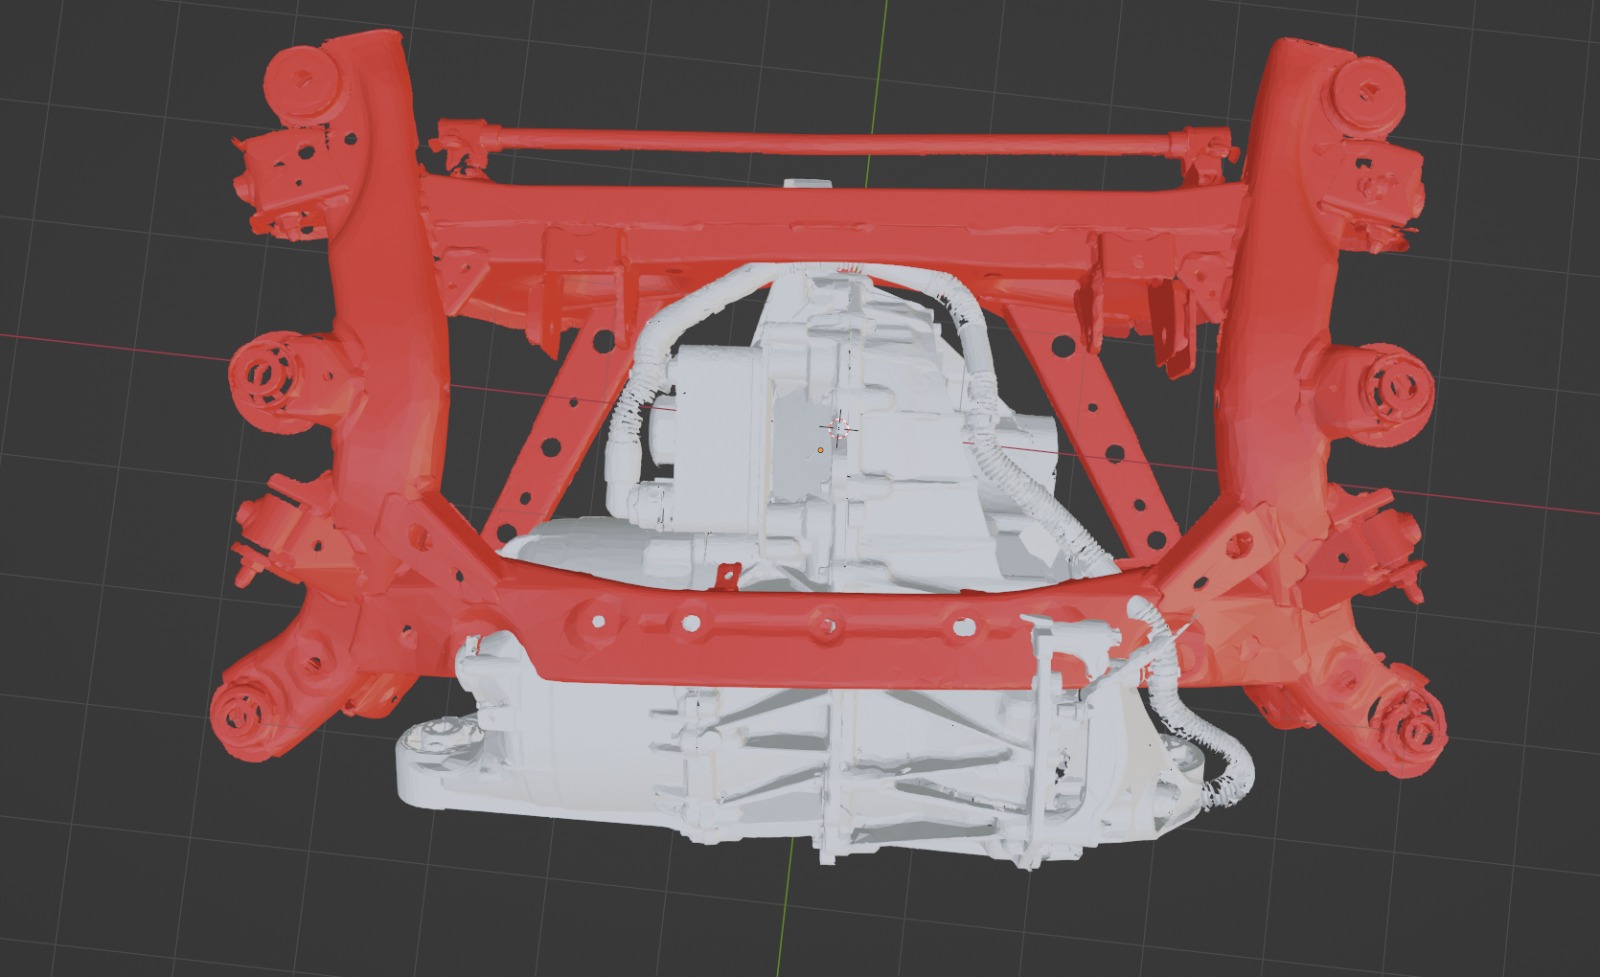
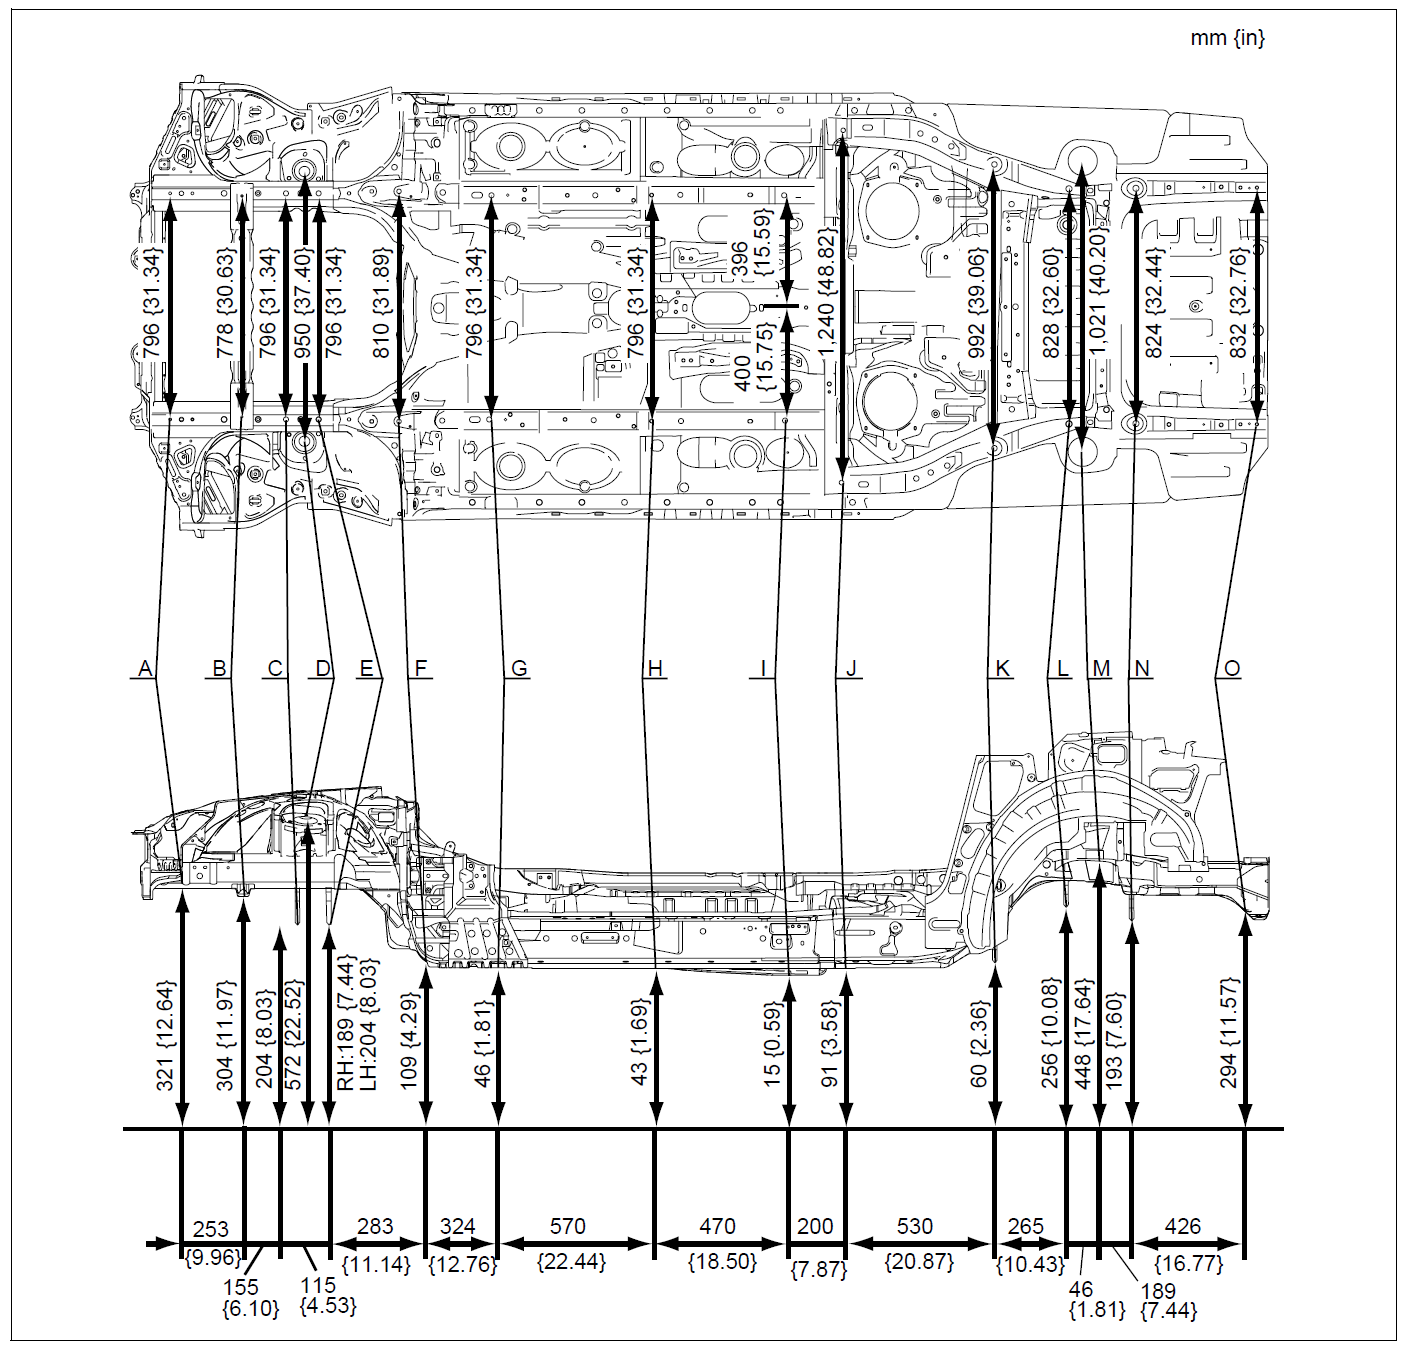
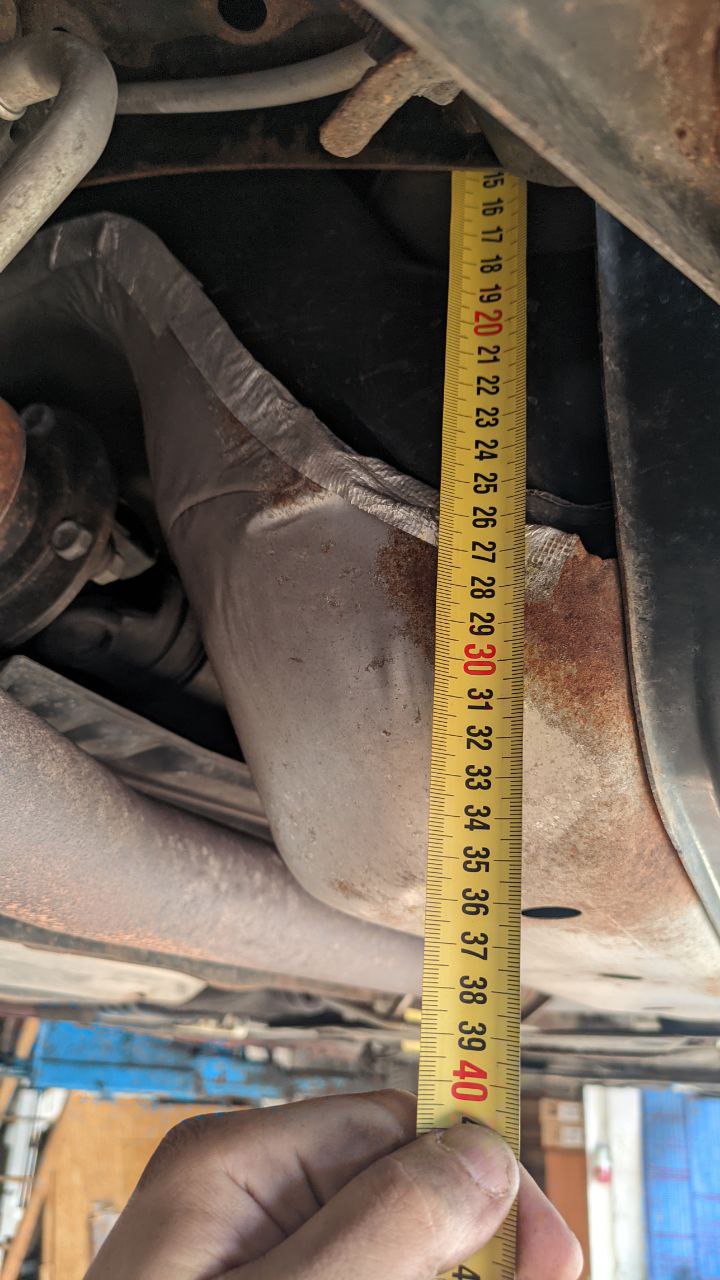
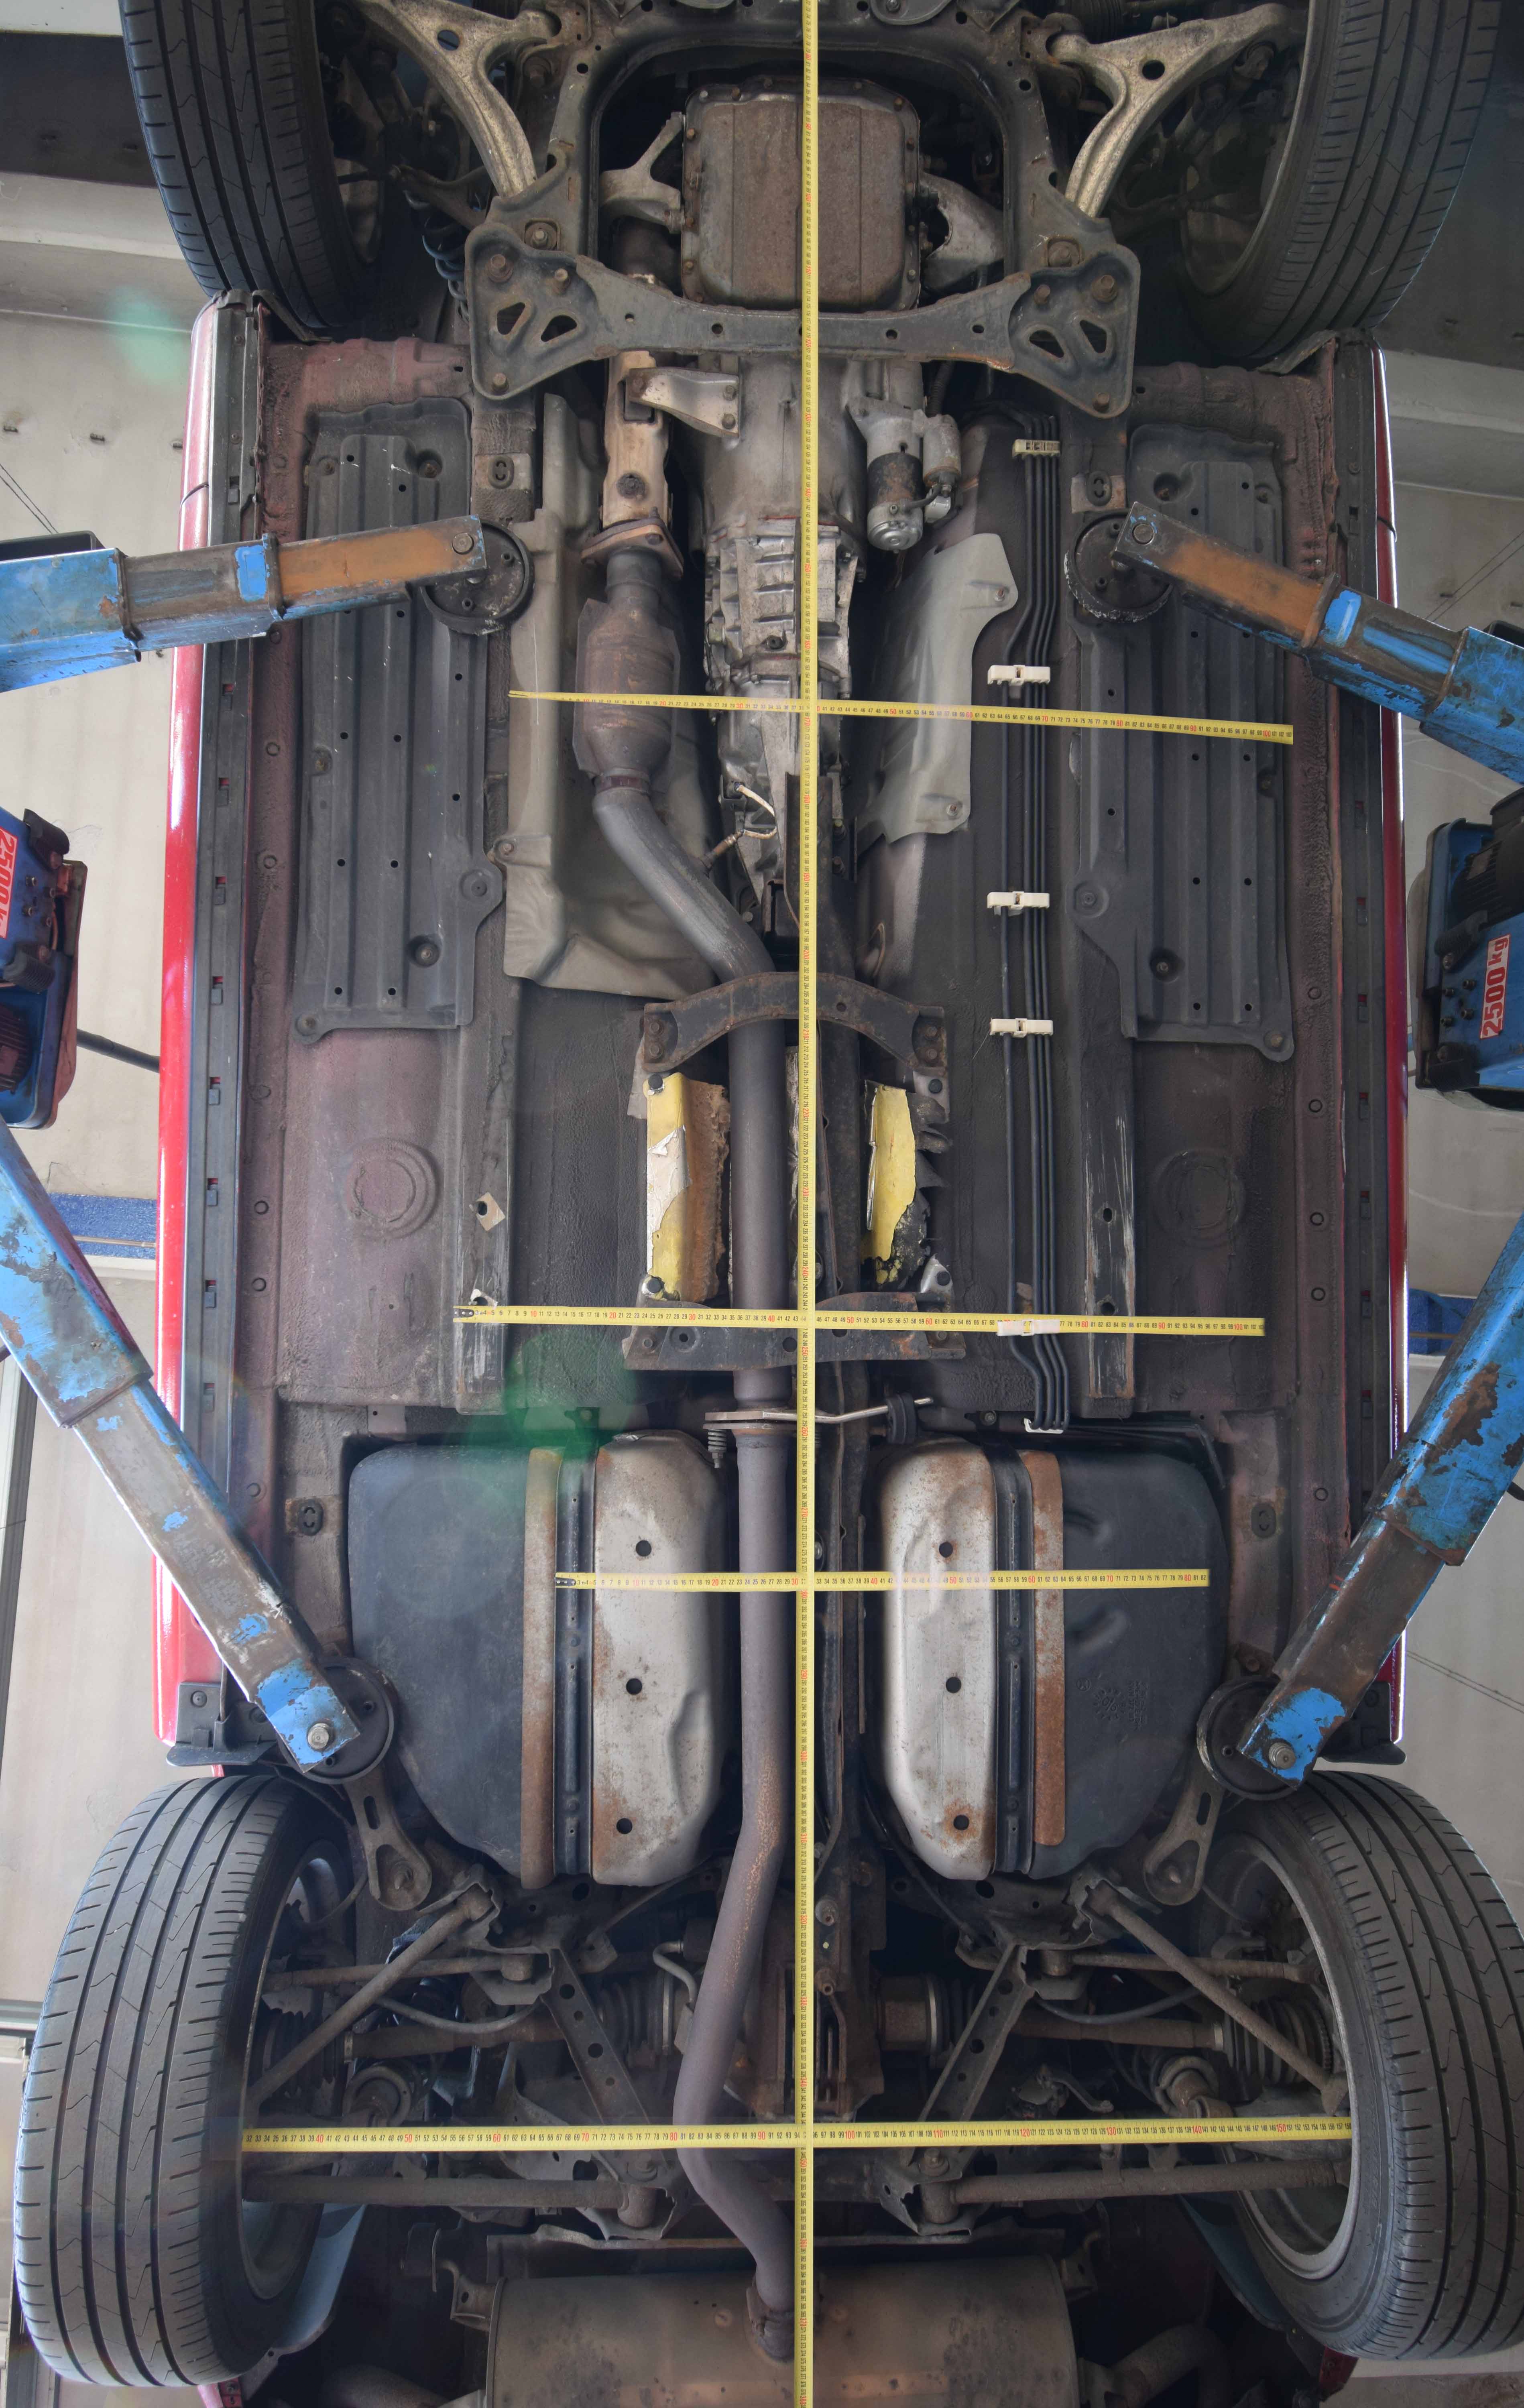
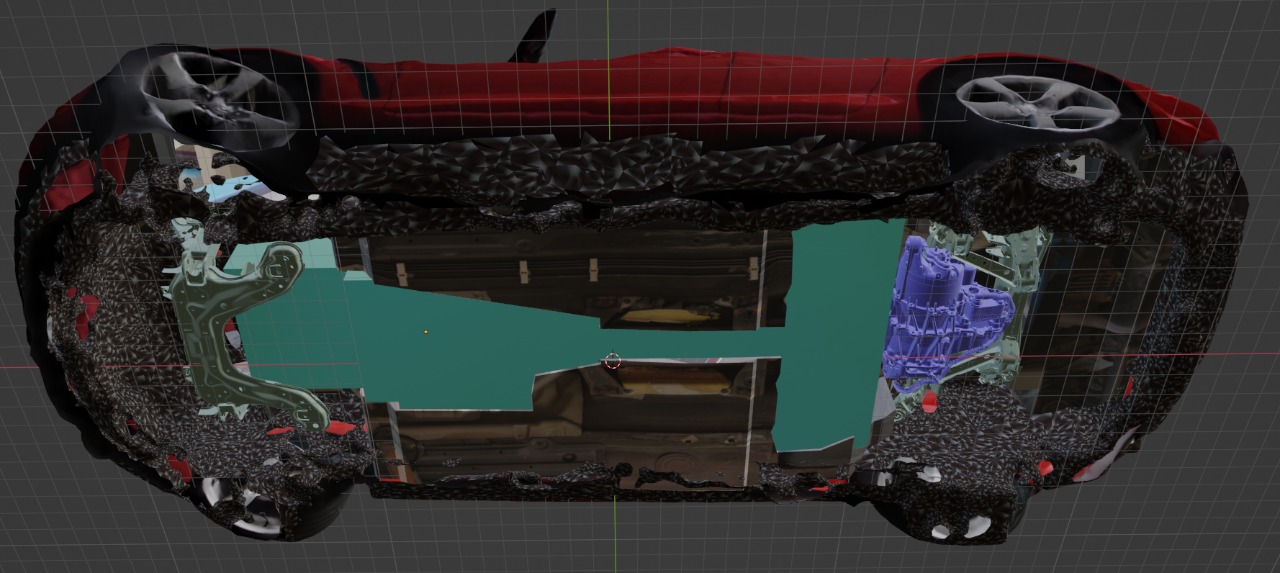
I spent some time last night bothering friends of mine while I was drafting a rough version of the chassis to understand how much volume will be available for the battery module (which is next to be designed). The body shop manual was very helpful, but not 100% complete, so some of the measurements were useful after all.

chassis mid-draft

Conservatively, it looks like between the part of the fuel tank which isn't occupied by the motor, the transmission tunnel, and the area formerly occupied by the long block, there's around 380L of space for the battery pack, which has to include the battery cells themselves as well as any structure, wiring, bus bars, cooling, etc.

roughed-out chassis with battery volume highlighted

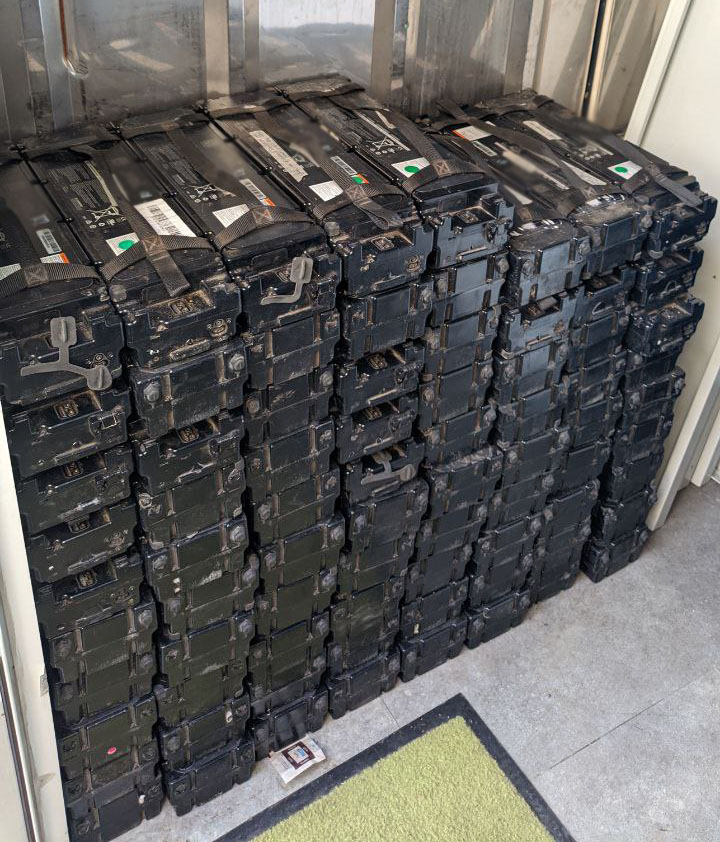
Using the existing NINEBOT scooter batteries as a rough reference for weight and volume (for a combined pack with overheads, not the individual cells), it looks like each kWh is about 4.4L, and will weigh about 7.3kg.

As the current plan is to build a 53.5kWh battery pack, that would mean the expected volume utilization is only 240L. Having "so much" extra space available is really good, as I expect that to shrink due to additional packaging and cooling overhead, and it will let me ensure the center of mass and weight distribution changes a little as possible.

Speaking of weight, I ran through the list of things which are being removed vs the things which are being added:

  • renesis engine: 297pounds
  • transmission: 80 pounds
  • rear diff: 75 pounds
  • exhaust: 40 pounds
  • full gas tank: 100 pounds

sum old bits: 592 pounds, 270kg

  • battery pack - 53.5kWh * 7.3kg = 390kg
  • motor: 90kg
  • AC/DC, DC/DC, and PDU: 15kg

sum new bits: ~500kg

so it looks like the car will gain about 230kg, which according to this spec sheet is within the cargo capacity of 425kg.

Motor Musings

There are a few different variants of the Model 3 RDU in the field. Looking at some measurements, I think I'm going to want one the 3D6 variant, which has the newer "hairpin" style stator windings, and the performance specs (lower "optimal" voltage of 320v instead of 335v). The 3D7 might even be better (wider range of speeds where it has power), but it would require a different battery architecture (higher voltage) which would throw off my plans for the AC/DC and other things...

Looking into driving the Tesla Model 3 RDU itself, there are a few different ways to interface with it:

  • Ingineerix on youtube posted a video in 2020 showing the interfacing via CAN: https://www.youtube.com/watch?v=LWVt5I0XKyk
  • EV-Controls sells a commercial solution to do the same https://www.ev-controls.com/product/ev-controls-t2c/
  • There's a massive thread on openinverter about the model 3 drive unit which has been going on (also since 2020): https://openinverter.org/forum/viewtopic.php?f=10&t=575

I'd prefer greatly to integrate the messaging/control to the motor into whatever CAN/CAN device I have to develop to drive the existing onboard electronics and interface with the charger and BMS... but unfortunately life doesn't appear to be that simple:

The Tesla drive units have quite a bit of logic on them, amongst the responsibilities of the inverter is implementing a cryptographic challenge to the security controller (part of the immobilization system). No (paired!) security controller, no dice. I asked Ingineerix via reddit messages if he had any hints or suggestions, and he very kindly responsed with these salient points:

  • The information to bypass the security pairing is extremely sensitive as it'd allow people to trivially steal cars. I'd have to reverse-engineer it myself, which considering it took Ingineerix months with access to a working car and years of experience working with automotive CAN (and electric conversions) puts this into the realm of "not really possible"
  • Once the motor is outside of the car, the pairing process between motor and security controller is extremely difficult if not impossible, and you'd need access to Tesla's service tools to do it
  • Be sure to get the connectors that go to the motor, as you can't get them aftermarket (and most sellers don't include them)
  • It's a really bad idea to do this piecemeal, and much smarter to buy a whole (dead) model 3 donor

If only I had the space... looks like I will be budgeting for the T2C. I also sent Ingineerix some "gas money" as his advice has definitely saved me some pain, time, and money.

Roughing out the motor location

Roughing out the motor location

I spent some time today figuring out where the electric motor is going to go. This is unfortunately a prerequisite before I can figure out where and how big the battery can be--it doesn't make sense to plan batteries only to find out that the motor is occupying your entire volume!

I'd like to, as much as it is possible, put the electric motor directly where the differential of the RX-8 was, which may involve some rear subframe stuff. I have the part drawings and some measurements, but what I really need to bring everything together is a detailed 3d model of the subframe. Someone has scanned their NC (gen-3) MX-5 subframes and put them online, and I was hoping that they'd be equivalent (there are various forum postings for and against). I did some digging, and while the rear subframe is /extremely/ similar, to the point of being bolt-on compatible, it's not 100% identical to the RX-8 rear subframe.

Spot the differences...

Thankfully, Andrew from Keisler Automation is super friendly, and sent me a copy of his 3d scanned RX-8 rear. Keisler sells bits and complete kits to swap a GM LFX V6 into an RX-8, and I noticed on their web store front for their rear differential kit something that looked like a 3d scan, so I asked nicely :)

It looks like the Tesla Small Drive unit wouldn't fit without quite a lot of modification, both to the subframe and the bodywork of the car. It'd also stick out the bottom, which is no bueno. The model 3 rear drive unit, however, seems to be possible and even reasonable.

Side view Top View

Body Shop Manual

Body Shop Manual

After I spent the time under the lift, I realized I was missing some measurements. After some googling, I stumbled across the body shop manual... which meant the whole tape measuring exercise was unneeded. Still glad I got under the car, though, and the pictures help me put things into context.

Up on a Lift

I took the car to a diy-shop today, where you can rent lifts by the half-hour. I had three goals:

  1. Take pictures and measurements of the various stuff in the car
  2. Get an intuition for how things might come together, including mounting
  3. See if I could see the exhaust leak

1 and 2 went really well, and I'll be using these pictures and measurements throughout the design process. I could not see the exhaust leak.

Depth at fuel tank

Composite of measurements

NeRF or Nothing

NeRF or Nothing

I took the opportunity today to record video walking around the car in its current state. Using the cloud tool Luma AI, I was able to convert it into a NeRF, or neural radiance field. You can check it out here. I'll be able to pull a skinned mesh out of this and use it for other things, I think. If not, it's cool at least!

Donor Batteries Collected

Donor Batteries Collected

I picked up the last of the batteries from the recyling bin today. In total, I have 77 Ninebot NEE1009-W packs, all with various levels of malfunctioning BMSes. They are being stored in a steel container in an industrial area away from any buildings in the case they decide to self-immolate.